How To Stencil Your Own Christmas Porch Sitter Sign
Thank You Exquisitely Unremarkable for such an awesome blog!
One of the great joys of Christmas is filling your home with festive decorations. But what about your porch? Don't let your doorstep be left out in the cold this holiday season. Add a personal touch with a stenciled porch sitter sign. It's an easy DIY, even if you've never crafted with stencils before.
I have to be honest, I've always wanted a porch sitter sign, but my front door is surrounded by a narrow stoop. No room for anything except a mat and one pair of feet. However, this summer, during our renovations, St. Nick showed up early and brought me a patio, a small wooden porch for our side entryway.
And a brand new outdoor space to decorate. Fabulous. Of course, while my husband was planning step and railing heights, I was dreaming of décor.
And not just any décor, Christmas décor. I envisioned a space filled with poinsettias, evergreens and a big old wooden sign to welcome
guests into our home.
Now, I've made a bunch of signs over the years, but I've never made a porch sitter and I knew that is what would look best.
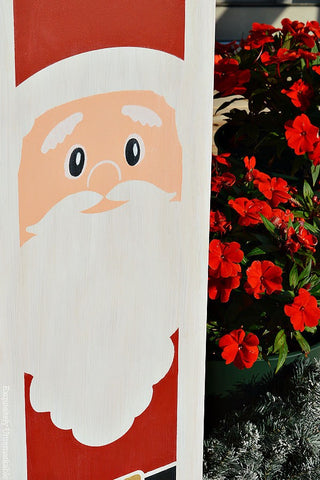
Something with scale. A real showstopper. I just wasn't sure exactly what that should be...words, symbols, a character? So I headed over to WallCutz Stencils to poke around at their Christmas collection and fell hard for Santa Claus. I mean can you blame me? He's adorable. I placed my order and got started crafting as soon as my stencil arrived. It was a perfect poolside activity for Christmas in July. And now I'll be ready to decorate early when the holidays actually roll around. Here's how I did it.
How To Stencil A Tall Porch Sign
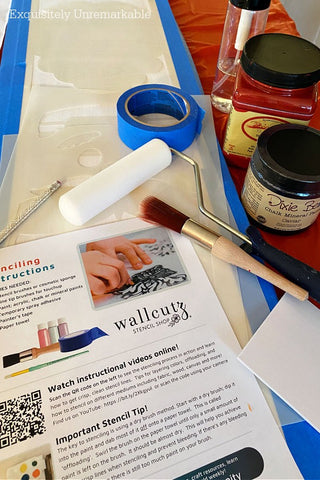
I gathered my supplies and covered my work area. For paint, I used chalk paint, mineral paint and acrylic craft paint since they work best for this type of application.
WallCutz Santa Claus Porch Stencil - I chose the 48" x 10" A tall board cut to size to fit the stencil
Red paint
Black paint
White paint
Skin tone paint
Gold paint
Stencil brushes
Small foam rollers
Index cards
Painter's tape
1. Cut Your Board To Size
When the stencil arrived, I unrolled it and laid it on my board to size it. Since I knew the stencil measurements beforehand, I could've had it cut at the hardware store when I purchased it.
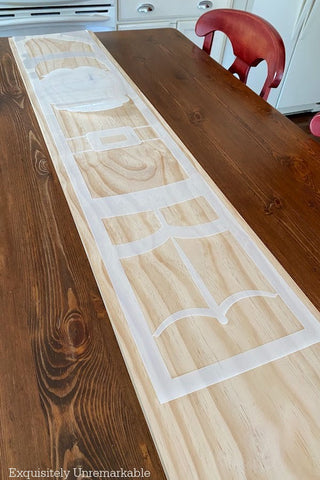
However, I wanted to be sure it was going to have the scale I craved, so I waited and cut the board myself.
2. Make A Plan
Planning is crucial when it comes to stenciling. Santa Claus and his sweet face came in several pieces.

That meant that there would be some layering going on and I wanted to get my order of operations straight and know where each piece of the puzzle was going to go before I started painting. I also wanted to map out the color of each section. I'm a traditional Christmas Decor kind of girl so I used the website photo as a guide and then wrote the colors on a large strip of paper, like a map, to keep me on track.
Also, while checking out the WallCutz website, I noticed a tip that said if you paint your board white, you won't have to paint Santa's beard or some of his trim. Um hello...quick and easy crafter here, so clearly my board was going to be white. There were more helpful hints, instructions and resources packed up with the stencil. A beginner's dream to help you get perfect results.
A small freebie stencil was included, as well. If you're a stencil novice, that would be a super way to experiment before you start your big project. And make a lovely little sign while you're at it.
3. Paint The Board A Base Color
As I said, I used white chalk paint to cover my board and I applied two coats, allowing the first coat to fully dry before adding the second. Since it was chalk paint there was no need to prime or prep my board in any special way.
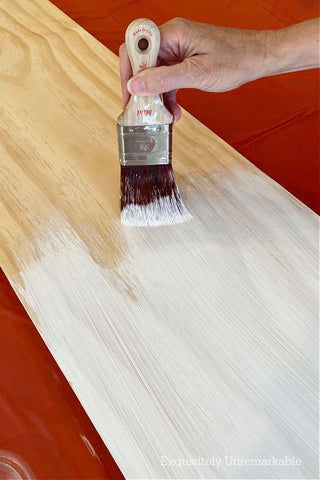
I also prefer a rustic look, so I wanted to see some of the knots and wood grain through the paint.
4. Tape The Stencil In Place
In the past, you might've heard me say that I'm not the greatest stenciler. And I'm not. I've stenciled walls, pillows, signs, aprons, placemats and plates - even ceiling fan blades - and I'm always nervous about bleeding paint. Over the years, I've gotten better and learned a few tricks to mitigate that issue, number one being make sure your stencil is secure. For that, I use painter's tape.

After I measured and centered my stencil on the board, I taped it down, all the way around, ensuring it wouldn't move. I didn't want it to wiggle or budge at all.
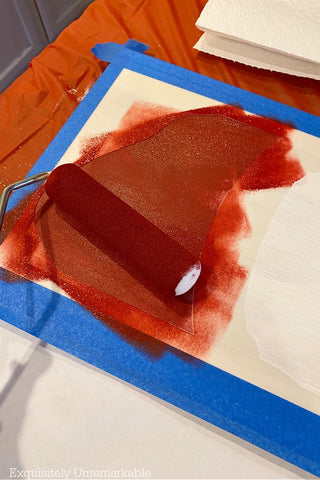
5. Add Paint With A Roller To Large Areas
My next no smudge trick involved a small foam roller.
I find I get a more even coat of paint, especially on the larger areas, without any bleeding, when I use a roller, rather than a brush. I simply added paint to the roller, moved it back and forth in my pan several times to make sure the paint was evenly dispersed. Then I gave it a quick roll on a sheet of paper towel to absorb any blobs, before I rolled over the stencil in long strokes being careful not roll off the stencil...Like I did here, but that's ok, a little white paint fixed that spot right up. And no one will ever be the wiser. Well, except you.
Of course, you can use a stencil brush, just make sure you offload your paint well before you apply it to the board in small circular motions. Once I'd finished the hat, I moved onto the area around Santa's beard. That was a little more complicated, since the beard wanted to pop up and there were cutouts, but
still not hard to do.

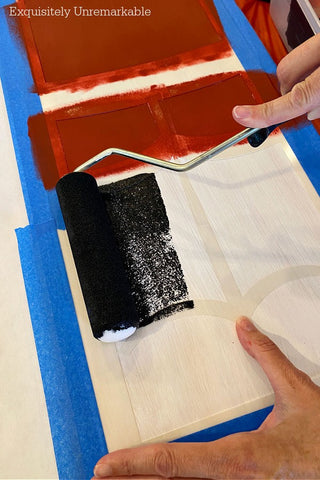
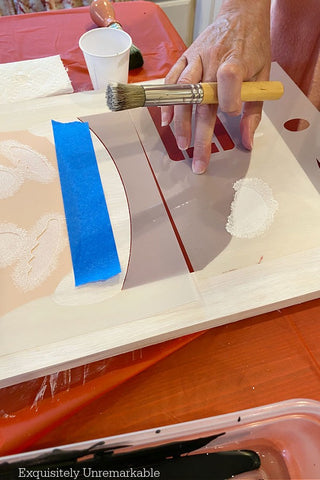
I used a ruler to keep his whiskers weighted and flat. Then I used an index card to hold down his belt and cover the open area, that was not supposed to be red, around his buckle. Super simple. With the red areas complete, I grabbed a fresh foam roller to tackle his black boots and belt.
The last time I used a roller was on Santa's face. However, this time, I used a much smaller roller to fit the area, using a skin tone paint.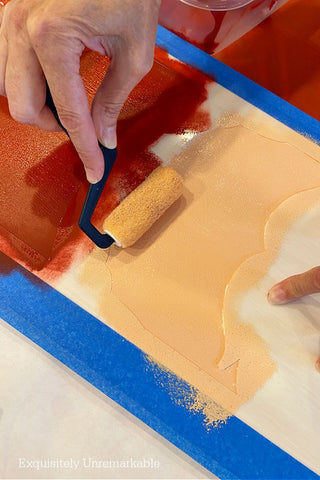
6. Remove The Stencil
At this point, I was done filling in all the large areas. I let the paint dry before I peeled back the stencil. It was the moment of truth.
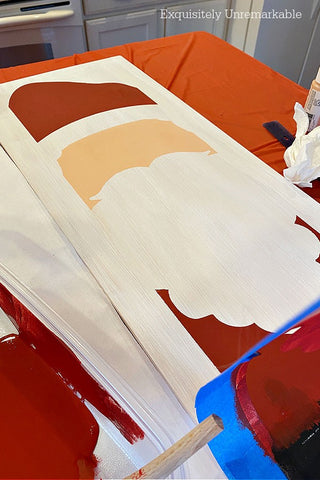
And a largely uneventful one at that. Thank goodness. My lines were super sharp, Santa looked fantastic and I looked like a master crafter. Which we all know, I am not. While, I'm sure my technique was helpful here, I give most of the credit to the quality of the stencil material. It was thick...very thick and very sturdy. So it was easy to get such clean lines up against a hard edge.
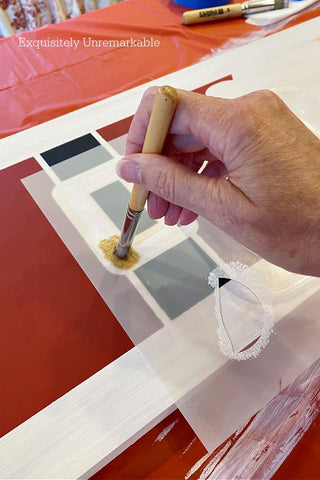
7. Layer The Smaller Stencils On Top And Paint
With my confidence bolstered, it was time to move on to the details. I started with the face, lined up the new stencils with the painted areas and taped them down.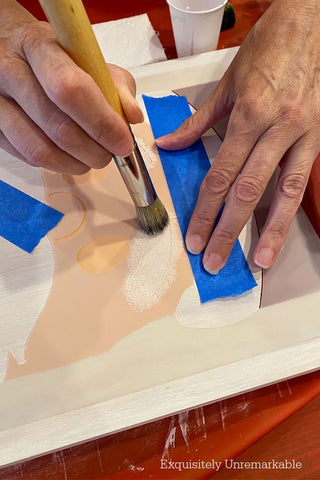
This time, I did use a brush. A roller would be too big for these tiny areas. When I finished the hat pom pom, I did freehand a shadow around it to make it pop, with a little gray paint.
Then I added a glittery gold paint to the buckle with the tiniest stencil brush and I was done, since the boot trim was already white. If there were any spots that needed a bit of clean up, I used a fine tip paintbrush to fix them.
8. Seal It
The final step in this process was to seal my porch stencil since it's going to spend most of its time outside.

I used a brush on clear satin, but you can use a spray polyurethane, as well.
I just like the brush on, since I know it holds up well and it won't yellow my snow white Santa Claus. Who by the way looks quite jolly on my porch.
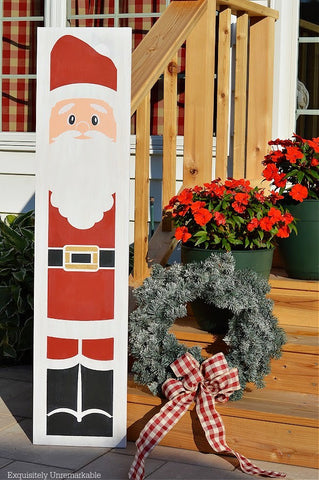
I told you he was adorable. Surrounded by a flocked wreath and burlap bow.
Oh yes, and flowers. After all, it's not Christmas yet. It's July.
Which means there's still time for me to make a summer porch sitter. And one for fall. Halloween and...well, you get it. 😉 What's on your porch?
This post was sponsored by WallCutz, all opinions are my own. You can read my full
disclosure here.
Love it! And your suggestions and tips are great. thanks for sharing!
Leave a comment